





Textured Ceiling to Smooth Finish: How Skim Coating Solves the Problem
Release time: September 24 2026
Views: 28

A textured ceiling can make a room feel dated, especially when the surface has uneven patches, old repairs, or heavy texture. If the ceiling itself is still in good condition, you may not need to remove and replace it. Skim coating is a practical way to smooth out the surface and create a clean, uniform finish for painting.
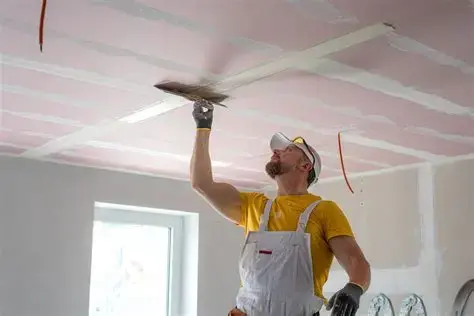
The process involves spreading a thin layer of joint compound over the existing ceiling, smoothing it with a wide blade, and repeating the process until the texture and imperfections are no longer visible. While it takes some time and patience, the right preparation and application technique can make a noticeable difference in the final result.
What Is a Skim Coat Ceiling?
A skim coat ceiling is an existing ceiling that has been covered with one or more thin layers of joint compound to create a smoother surface.
Skim coating is often used when a ceiling has:
An outdated textured finish
Minor dents, scratches, or surface imperfections
Visible drywall joints or previous repairs
Uneven areas caused by patching
A surface that needs to be smoothed before painting
It is particularly useful during renovations when the existing ceiling is structurally sound but the finish no longer meets the desired appearance.
Skim coating is not intended to fix major substrate problems. Loose drywall, significant cracks, water damage, or unstable areas should be repaired first.


Why Skim Coat a Ceiling?
The biggest advantage of skim coating is simple: it gives you a smoother, more consistent surface to work with.
Paint does not hide every imperfection. In fact, strong overhead lighting or sunlight coming through a window can make ridges, patches, and changes in texture even more noticeable.
A properly applied skim coat can help:
Smooth out surface textureThin layers of joint compound can gradually cover minor texture and irregularities.
Refresh an older ceilingInstead of removing the existing finish, skim coating can give a usable ceiling a cleaner, more modern appearance.
Create a better painting surfaceA consistent substrate helps primer and paint go on more evenly and reduces visible differences in texture.
Save time during renovationWhen the existing ceiling is sound, improving the surface can be less disruptive than replacing the entire ceiling.

How to Skim Coat a Ceiling
A smooth ceiling starts with good preparation. Rushing through the early stages usually creates more work during sanding and painting.
Prepare the Ceiling
Before applying any compound, protect the floor, furniture, walls, light fixtures, and other areas that could be affected by dust or splatter.
Clean the ceiling thoroughly and remove dust, cobwebs, loose paint, and any other material that could interfere with adhesion.
Next, inspect the entire surface. Repair damaged drywall, significant cracks, holes, or loose areas before skim coating. If the existing texture is very heavy, some of it may also need to be removed or flattened first.
The smoother and more stable the substrate is, the easier it will be to achieve an even finish.
Mix and Prepare the Joint Compound
The consistency of the joint compound matters. It should be smooth enough to spread easily but firm enough to stay on the ceiling without excessive sagging.
Depending on the project and application method, contractors may apply the compound with a roller and then smooth it with a wide drywall knife or skimming blade. For smaller areas, the compound can be applied directly with a knife.
Avoid adding too much water. An overly thin mixture can make ceiling application messy and may increase sagging, while a mixture that is too stiff can be difficult to spread evenly.
For projects that require consistent workability and a smooth finish, choosing the right jointing compound is just as important as choosing the right tools.
You can explore LONZONE's jointing compound solutions for different plasterboard finishing applications.
Apply the First Coat
Work in manageable sections and spread a thin layer of compound across the ceiling.
Use a wide blade to smooth the material and remove excess compound. Keep the pressure consistent and use long, overlapping strokes where possible. Don't worry if the first coat isn't perfectly smooth—the purpose of this coat is to establish an even base and reduce the existing texture.
One common mistake is trying to get the ceiling completely smooth in a single pass. Applying too much compound at once can lead to sagging, longer drying times, and more difficult sanding.
Several thin coats are generally easier to control than one thick coat.
Let the Compound Dry
Allow the first coat to dry completely before sanding or applying another coat.
Drying time varies depending on the type and thickness of the compound, temperature, humidity, and ventilation. Don't rely only on the surface feeling dry. The material underneath also needs to be sufficiently dry before the next stage.
Once dry, lightly sand the ceiling to remove ridges, high spots, and other visible imperfections. A drywall pole sander can make large ceiling areas easier to handle.
Remove the sanding dust before applying the next coat.
Apply a Second Coat
The second coat is where the surface usually starts to look significantly more uniform.
Apply another thin layer, focusing on areas where texture, low spots, or uneven transitions are still visible. Use the blade to feather the edges and avoid leaving heavy ridges.
For heavily textured ceilings or surfaces with multiple imperfections, a third coat may be needed.
The goal is not to build up a thick layer of material. Instead, each coat should gradually improve the surface until the ceiling is consistently smooth.
Sand and Check the Surface
After the final coat has dried, inspect the ceiling carefully.
Don't rely on normal room lighting alone. Turn on the lights that will be used in the finished room or inspect the ceiling from different angles. Shadows can reveal ridges and shallow depressions that are difficult to see under flat lighting.
Lightly sand any remaining imperfections and spot-repair areas that still need attention.
Take your time at this stage. Small defects that seem insignificant before painting can become much more obvious once a uniform coat of paint is applied.
Prime Before Painting
Once the skim coat is smooth and dust-free, apply an appropriate primer before the finish paint.
Joint compound is more absorbent than many surrounding surfaces. If you paint directly over a skim-coated area without proper preparation, the finished surface may have differences in sheen or color.
A suitable primer helps even out the absorption of the substrate and provides a more consistent base for the final paint.
What Joint Compound Should You Use for a Ceiling?
The best joint compound depends on the substrate, finishing system, application method, and level of finish required.
For a traditional plasterboard finishing system, different compounds may be used for different stages of the work. A base coat can be used for initial joint treatment and buildup, while a topping compound can provide a smoother surface for the final finish.
For example, LONZONE's Base Coat is developed for the first and second coats in a three-coat plasterboard jointing system, while its Topping formulation is designed for smooth application and easy sanding.
For a skim coat ceiling, look for a compound that offers good spreadability, consistent adhesion, workable drying characteristics, and a finish that can be sanded without excessive effort.
The material should also be selected based on the existing substrate and the overall finishing system rather than simply choosing the product with the smoothest texture.
Explore LONZONE's jointing compounds to see options for plasterboard finishing and related applications.
Common Skim Coating Mistakes to Avoid
Even a relatively simple ceiling renovation can become time-consuming when the application process is rushed. Watch out for these common problems:
Applying the compound too thickly
Skipping cleaning and surface preparation
Trying to cover heavy texture in one coat
Sanding before the compound has fully dried
Leaving sanding dust on the surface
Failing to feather the edges between repaired areas
Painting without priming the skim-coated surface
Expecting one coat to produce a perfectly smooth finish
Good skim coating is less about applying a large amount of material and more about building a smooth surface gradually.
Skim Coating as Part of a Complete Drywall Finishing System
For contractors and building material suppliers, the quality of the final ceiling depends on more than application technique. The workability of the compound, compatibility between different coats, drying behavior, and sanding performance can all affect productivity and the finished appearance.
LONZONE is a building materials R&D and manufacturing company offering solutions including jointing compounds, gypsum-based materials, mortars, and ALC wall panels and blocks. Its products are used across different construction applications and markets, supported by its manufacturing capabilities and experience with projects in multiple regions.
You can learn more about LONZONE's experience across international markets through its Global Projects.
For a related guide on achieving a smooth plasterboard finish, see LONZONE's guide to plasterboard jointing.
Final Thoughts
Skim coating is a straightforward way to turn a textured or uneven ceiling into a smooth, paint-ready surface without necessarily replacing the existing ceiling.
The key is to take the process one stage at a time: prepare the substrate properly, apply thin coats, allow each layer to dry, sand carefully, and prime before painting.
With a suitable joint compound and the right technique, even an older textured ceiling can be transformed into a cleaner, more uniform surface that provides a solid foundation for the final paint finish.


