





Plasterboard Base Coat: Getting the Joint Finish Right
Release time: September 24 2026
Views: 20
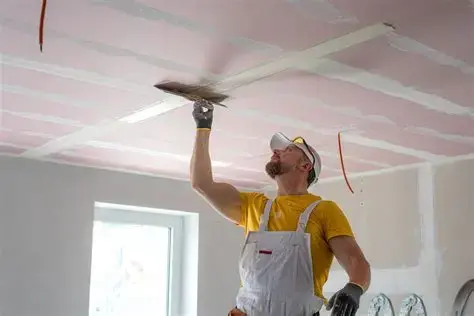
A smooth, durable plasterboard finish starts well before the final coat of paint. Proper joint treatment is essential, and the base coat is one of the key materials in the process.
Applied over plasterboard joints and used with joint tape, a base coat helps reinforce the joint, cover the tape, and create an even surface for subsequent coats. When the right product is used and applied correctly, it can help minimize common finishing problems such as visible joints, cracking, uneven surfaces, and excessive sanding.
So, what should you look for in a plasterboard base coat, and how should it be applied? Here is a practical guide for contractors, builders, and material buyers.
What Is Plasterboard Base Coat?
Plasterboard base coat is a jointing material used during the initial stages of plasterboard and drywall finishing. It is typically applied over board joints before the surface is built up and smoothed with additional coats.
The main job of the base coat is to provide a solid foundation for the joint. It needs to bond well to both the plasterboard and joint tape while remaining easy to spread and work with on site.
Depending on the formulation and application, a good plasterboard base coat may offer:
Strong adhesion to plasterboard and joint tape
Smooth, workable application
Suitable setting or drying time
Good joint strength
Controlled shrinkage
Consistent coverage
Compatibility with finishing compounds
The base coat is therefore not simply a filler for the gap between two boards. It forms an important part of the overall plasterboard jointing system.
Why Is Base Coat Important for Plasterboard?
Where two plasterboard panels meet, the joint needs to be reinforced and properly covered before the wall can be painted or decorated. Without proper joint treatment, seams may remain visible or develop cracks over time.
The base coat plays several roles in this process.
Embedding Joint Tape
The first layer of compound is used to embed joint tape over the plasterboard seam. The tape reinforces the joint and helps accommodate normal movement between adjacent boards.
Good adhesion is important here. The tape should sit firmly in the compound without wrinkles, air pockets, or loose edges.
Building Up the Joint
Once the tape is embedded, additional compound is applied to gradually build up the joint.
The compound should be spread beyond the seam and feathered at the edges rather than left as a thick ridge. This wider transition makes the joint easier to blend into the surrounding board surface.
For more information about base coat applications and the factors that affect material selection, see our guide to base coat plaster uses and application.
Preparing for the Final Finish
A well-applied base coat provides a stable foundation for subsequent coats. The aim is to create a smooth transition between the joint and the plasterboard so that the seam is not noticeable after sanding, priming, and painting.
How to Apply Plasterboard Base Coat
Although application methods can vary depending on the product and plasterboard system, the basic process is straightforward.
Prepare the Plasterboard
Before applying the compound, make sure the boards are securely fixed and the joint area is clean and free from dust or loose material.
Check the joints for gaps, damaged edges, or other defects that may need to be addressed first. Good preparation helps the compound bond properly and makes the following stages easier.
Apply the First Coat
Spread an even layer of base coat over the joint using a suitable drywall knife or finishing tool.
Place the joint tape into the wet compound and press it firmly into position. Remove excess compound from the surface while making sure the tape remains fully embedded.
Take care not to trap air underneath the tape, as bubbles and loose sections can affect the finished joint.
Apply the Second Coat
After the first coat has set or dried according to the manufacturer's instructions, apply a second layer over the joint.
This coat should extend beyond the edges of the first layer. Feathering the compound outward helps reduce the height difference between the joint and the surrounding plasterboard.
Apply the Finishing Coat
The final coat is generally applied more thinly and over a wider area. It helps refine the joint and prepare the surface for sanding and decoration.
Avoid applying unnecessarily thick layers. Excess material can increase drying time and make sanding more difficult.
For a closer look at the number of joint compound coats typically used over plasterboard tape, see our guide to how many coats of joint compound over tape are needed.
Common Plasterboard Base Coat Problems
Application technique and site conditions can have just as much impact on the finished result as the product itself.
Cracking
Cracks can occur for several reasons, including excessive material thickness, movement at the joint, poor tape installation, or unsuitable substrate conditions. Incorrect mixing can also affect the performance of the compound.
Following the manufacturer's recommended mixing ratio, application thickness, and drying or setting time is essential.
Visible Joint Lines
If the compound is not spread wide enough or the edges are not properly feathered, the joint may remain visible after painting.
This problem is particularly noticeable when strong light falls across the wall at an angle.
Poor Adhesion
Dust, loose particles, or contamination on the plasterboard can prevent the compound from bonding properly.
The surface should therefore be clean and sound before application. The base coat should also be compatible with the plasterboard and joint tape being used.
Too Much Sanding
Heavy sanding is often the result of uneven or overly thick application. Building the joint gradually and feathering each coat properly can help reduce the amount of correction required later.
How to Choose a Plasterboard Base Coat
Choosing the right plasterboard base coat starts with understanding the project requirements.
Consider the application method first. A product intended for manual application may have different working characteristics from one designed for a particular mechanical application process.
Next, look at adhesion, joint strength, and workability. The base coat needs to hold the joint tape securely while giving installers enough working time to achieve a clean, even joint.
The finishing requirements also matter. A standard residential wall may have different surface requirements from a commercial interior where strong side lighting can highlight even minor imperfections.
Finally, consider the compatibility of the complete system. The base coat should work well with the plasterboard, joint tape, finishing compound, primer, and final decorative coating.
If you are looking for a dedicated solution for plasterboard joint treatment, take a look at our plasterboard base coat for more product information.
A Better Plasterboard Finish Starts With the Base Coat
A professional plasterboard finish is built layer by layer. Proper surface preparation, accurate tape embedding, controlled application, and sufficient drying or setting time all contribute to the final result.
The typical process is:
Plasterboard → Base Coat + Joint Tape → Additional Jointing Coats → Sanding → Primer → Final Finish
For contractors, distributors, and building-material professionals, choosing a base coat that matches the plasterboard system can make the finishing process easier and more consistent.
LONZONE develops and manufactures gypsum-based mortars, jointing compounds, ALC wall panels, and other building-material solutions for different construction applications. For project-specific requirements, product selection, or technical support, our team can help you identify a suitable plasterboard jointing system.


