





Skim Coating Walls: How to Achieve a Smooth, Durable Finish
Release time: September 03 2026
Views: 95
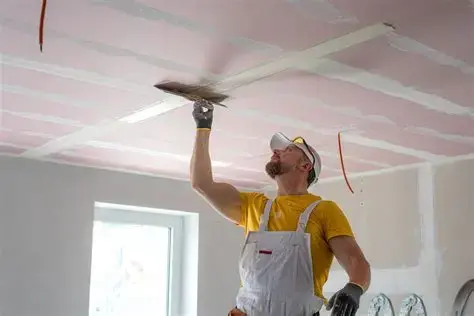
When a wall looks uneven after painting, the problem often starts before the paint is applied. Small surface imperfections, inconsistent textures, visible joints, and minor cracks can become much more noticeable under strong lighting.
This is why skim coating walls is an important step in many wall finishing systems.
As a dry mix mortar manufacturer and building material specialist, we approach skim coating as more than simply applying a thin layer of material. The final result depends on the relationship between the substrate, skim coat formulation, application method, drying conditions, and final decorative finish.
In this guide, we explain what skim coating is, when it should be used, how to apply it correctly, and how to select a suitable skim coat material for different construction projects.
What Is Skim Coating?
Skim coating is the application of a thin finishing layer over a wall or ceiling to create a smoother and more uniform surface.
It is commonly used to improve the appearance of:
Drywall and plasterboard
Plastered walls
Concrete walls
AAC and lightweight wall systems
Renovation surfaces
Walls prepared for painting or wallpaper
The purpose is generally not to correct major structural or dimensional problems. Instead, skim coating helps deal with relatively minor surface imperfections and creates a consistent substrate for subsequent decoration.
From a material perspective, we recommend treating skim coating as part of a complete wall finishing system rather than as an isolated product.
Why Skim Coat Walls?
There are several situations where skim coating can provide significant benefits.
Create a Smooth Wall Surface
The most obvious purpose of skim coating is to achieve a smooth and consistent surface.
Even when the underlying wall is structurally sound, differences in texture can remain visible after painting. A properly applied skim coat helps create a more uniform appearance.
Improve Existing Walls
Renovation walls often contain old repair areas, minor dents, scratches, and inconsistent textures.
Instead of completely rebuilding a sound wall, an appropriate finishing system can help restore a more uniform surface.
Prepare Walls for Painting
Paint does not hide every surface defect. In many cases, it actually makes imperfections more visible, particularly under strong or grazing light.
A properly prepared skim-coated surface gives the primer and paint a more consistent substrate.
Improve the Final Decorative Effect
The smoother and more uniform the substrate, the easier it is to achieve a consistent final decorative finish.
This is particularly important for:
High-end residential interiors
Hotels
Offices
Commercial buildings
Public buildings
Spaces with strong architectural lighting
When Should You Skim Coat a Wall?
Not every wall requires a full skim coat.
We generally recommend considering skim coating when the wall is structurally sound but the surface requires additional finishing.
Typical applications include:
New Drywall
Drywall can have visible joints, fastener areas, and differences between board surfaces and joint treatment. A suitable finishing system can help create a continuous appearance.
Existing Plaster
Older plaster surfaces may have accumulated minor imperfections over time. After proper preparation, skim coating can improve surface uniformity.
Concrete Surfaces
Concrete walls may require surface preparation and an appropriate bonding or base layer before a finishing material is applied.
AAC Wall Systems
AAC panels and lightweight wall systems require materials that are compatible with the substrate and the overall wall construction system.
Renovation Projects
For renovation projects, the existing coating must first be evaluated. Loose paint, contaminated surfaces, moisture damage, and unstable substrates should be addressed before skim coating.
How to Skim Coat Walls Step by Step
The exact process depends on the substrate and product specification, but the following workflow provides a practical starting point.
Step 1: Inspect the Substrate
Before applying any skim coat, check the wall carefully.
Look for:
Cracks
Loose material
Dust
Oil or grease
Peeling paint
Moisture damage
Deep holes
Significant unevenness
A skim coat should not be used to hide serious substrate problems.
If the wall has major defects, repair or level the substrate first.
Step 2: Clean and Prepare the Wall
The surface should be stable, clean, and suitable for receiving the finishing material.
Remove loose particles and contaminants. Where necessary, use the appropriate primer, bonding treatment, repair mortar, or base coat according to the substrate.
This step is often underestimated, but good substrate preparation has a direct influence on adhesion and long-term performance.
Step 3: Choose the Right Skim Coat Material
Material selection should be based on the actual application rather than simply choosing the cheapest product.
Consider:
Substrate type
Required surface finish
Application thickness
Adhesion requirements
Working time
Drying characteristics
Sandability
Crack resistance
Local temperature and humidity
Manual or mechanical application
For example, a finishing material developed for drywall should not automatically be assumed to provide the same performance on concrete or AAC substrates.
Step 4: Mix the Material Correctly
Follow the specified powder-to-water ratio and mixing procedure.
The consistency of the mixture affects workability and final surface quality.
Too much water can change the material's performance, while insufficient water may make the material difficult to spread and finish.
For professional projects, consistent mixing is especially important because variation between batches can result in inconsistent application and appearance.
Step 5: Apply the Skim Coat
Use the appropriate trowel or finishing tool to spread the material evenly.
The objective is to achieve a consistent surface rather than simply applying as much material as possible.
We recommend controlling:
Application thickness
Trowel angle
Application pressure
Material consistency
Working sequence
For larger projects, application consistency between workers is also important.
Step 6: Allow the Material to Dry Properly
Drying conditions have a significant influence on the final result.
Temperature, humidity, ventilation, substrate absorption, and layer thickness can all affect drying.
Avoid forcing the material to dry too quickly through excessive heat or strong airflow.
Step 7: Inspect and Finish the Surface
After the material has reached the appropriate condition, inspect the surface.
Check for:
Trowel marks
Pinholes
Uneven areas
Visible transitions
Localized defects
Depending on the product specification, light sanding or localized correction may be required.
Step 8: Apply Primer and Decorative Finish
Once the surface has been properly prepared, apply the appropriate primer before painting or wallpaper installation.
The objective is to create a complete finishing system rather than treating skim coating as the final step.
Skim Coating vs. Plastering: What Is the Difference?
Skim coating and plastering are often discussed together, but they serve different purposes.
Plastering or base coating is generally used to build up a surface, level larger irregularities, or establish the required substrate.
Skim coating is primarily a finishing process designed to improve surface smoothness and uniformity.
A typical wall finishing sequence may therefore look like:
Wall Substrate → Surface Preparation → Repair/Base Coat → Skim Coat → Primer → Paint
The actual system should be determined according to the substrate and project requirements.
One of the most common mistakes we see is attempting to use a thin finishing material to correct major wall unevenness. If significant leveling is required, an appropriate base coat or repair mortar should normally be used first.
Common Skim Coating Mistakes
Applying Too Much Material
Skim coat is generally designed as a thin finishing layer.
Applying excessive thickness in an attempt to correct major unevenness can increase the risk of shrinkage, cracking, and uneven drying.
Skipping Surface Preparation
Dust, loose particles, grease, and unstable coatings can compromise adhesion.
Always evaluate the substrate before application.
Choosing a Material Without Considering the Substrate
Different wall systems have different requirements.
Drywall, concrete, plaster, and AAC panels should not automatically be treated as identical substrates.
Changing the Water Ratio
Changing the amount of water from batch to batch can affect consistency and workability.
For commercial construction, standardized mixing procedures are particularly important.
Ignoring Environmental Conditions
Temperature, humidity, ventilation, and substrate moisture can all influence the performance of a skim coat.
Sanding Too Early
If the material has not reached the appropriate condition, premature sanding can damage the surface instead of improving it.
How We Approach Skim Coat Material Development
When we develop or manufacture wall finishing materials, we do not look at the skim coat formulation alone.
We evaluate the complete application scenario.
Depending on the project, this can include:
Substrate characteristics
Local climate
Required working time
Application method
Surface finish requirements
Packaging requirements
Target market standards
Production stability
Quality control requirements
Our R&D work is supported by Ph.D.-level technical expertise and joint laboratory cooperation with universities. This allows us to work on formula development, formula matching, and performance optimization rather than relying only on a fixed standard formulation.
For private-label and OEM projects, we can also work from an existing formula, product concept, or target-market requirement through sample testing, trial production, and mass production.
If you are developing a skim coat, wall putty, jointing compound, or other wall finishing product, contact our team with your substrate, performance requirements, packaging, and target market. We can discuss the most suitable material and manufacturing approach for your project.
Choosing a Skim Coat Manufacturer
If you are purchasing skim coat for a construction project, choosing the right manufacturer can be as important as selecting the right formulation.
We recommend evaluating five areas.
R&D Capability
A manufacturer should be able to understand why a formulation works and how it needs to be adjusted for different substrates and markets.
Manufacturing Stability
A good formulation is only useful if it can be reproduced consistently at commercial scale.
Production control and raw material management are therefore critical.
Testing and Validation
Samples should be tested before large-scale production.
For OEM projects, we follow a staged process covering requirements discussion, formula development or matching, sample testing, packaging confirmation, trial production, mass production, and delivery.
Product Range
Wall finishing projects rarely involve only one material.
Depending on the construction system, related products may include:
Wall putty
Jointing compound
Base coat
Repair mortar
Tile adhesive
Waterproofing mortar
Thermal insulation mortar
Having access to a broader dry mix mortar portfolio can make it easier to develop a compatible material system.
Project Experience
Real project experience provides another way to evaluate material application capabilities.
Our project experience includes applications associated with the Nanjing Hospital of Traditional Chinese Medicine, Hangzhou Olympic Sports Center, National Exhibition and Convention Center in Shanghai, Zhongnan Center, Xi'an Jiaotong-Liverpool University, and Nantong University.
You can view our global building material projects to see examples of major construction applications.
Skim Coating for Different Wall Systems
Drywall and Plasterboard
For drywall, the finishing system needs to address joints, fasteners, and differences in surface texture.
A properly selected skim coat or finishing compound can help create a continuous surface before decoration.
AAC Panels
AAC panels require compatible jointing and surface finishing materials.
Because AAC is a lightweight and highly porous substrate, material selection and surface preparation should be considered carefully.
Concrete Walls
Concrete surfaces can vary considerably in roughness, porosity, and moisture condition.
Before skim coating, assess the surface and determine whether a bonding treatment, repair mortar, or base coat is required.
Existing Plastered Walls
For renovation work, we recommend checking the condition of the existing plaster first.
If the existing layer is loose or unstable, applying another finishing layer on top will not solve the underlying problem.
Why Manufacturing Quality Matters
From our technical perspective, the final performance of a skim coat starts long before the material reaches the construction site.
Raw material selection, formulation design, mixing technology, quality control, and production stability all influence the material's behavior during application.
A successful skim coat needs to balance characteristics such as:
Workability
Adhesion
Water retention
Open time
Surface smoothness
Crack resistance
Setting behavior
Sandability
Substrate compatibility
This is why we recommend evaluating skim coating as a system of material + substrate + application method, rather than simply comparing the price of different products.
Final Thoughts on Skim Coating Walls
Skim coating walls may look like a simple finishing process, but consistently achieving a smooth surface requires control at every stage.
Start with a stable substrate. Choose a compatible skim coat. Mix it consistently. Apply the correct thickness. Control the drying conditions. Then complete the surface preparation before painting.
For distributors, contractors, developers, and building material brands, the manufacturing side is equally important. Formula development, testing, production stability, and quality control determine whether a product can deliver consistent results from one project to the next.
At LONZONE, we combine dry mix mortar R&D, formulation development, manufacturing, and practical project experience to develop wall finishing solutions for different construction requirements. Our manufacturing capabilities cover products including wall putties, jointing compounds, repair mortars, waterproofing mortars, tile adhesives, and thermal insulation mortars.
Have a skim coat or wall finishing project in development? Talk to our teamabout your product requirements, formulation, packaging, and manufacturing needs.


